
Do you want to try WordPress on your local Windows Computer? If the answer is yes, then congratulation, you have landed on the right place. In this article we’ll teach you how you can install WordPress locally on your Windows Computer.
There are many advantages you have when you install WordPress locally. It is the cheapest and the best way to learn the basics of WordPress. Moreover, it is also a great way to test themes, plug-ins, and updates. You’ll also have the chance to test any significant changes you make to your site. As a result, you’ll be able to find and fix any issues without affecting your original live website. So, we highly recommend that you install WordPress locally on your computer.
Remember! This guide will help you install WordPress locally on your Windows computer. Hence, it will be available just in your computer. If you want to go online then you’ll need a domain name and hosting.
Now let’s learn how to install WordPress locally using WAMP.
What is WAMP?
WampServer refers to a software stack for the Microsoft Windows operating system, created by Romain Bourdon and consisting of the Apache web server, OpenSSL for SSL support, MySQL database and PHP programming language.

Installing WAMP on your Windows Computer
To use WordPress in your computer you’ll have to create a local server environment in the first place. For this you’ll need to install WAMP.
At first, go to WampServer(http://www.wampserver.com/en/ ). Depending upon your computer, download the version of WAMP that suits you: 32-bit or 64-bit.
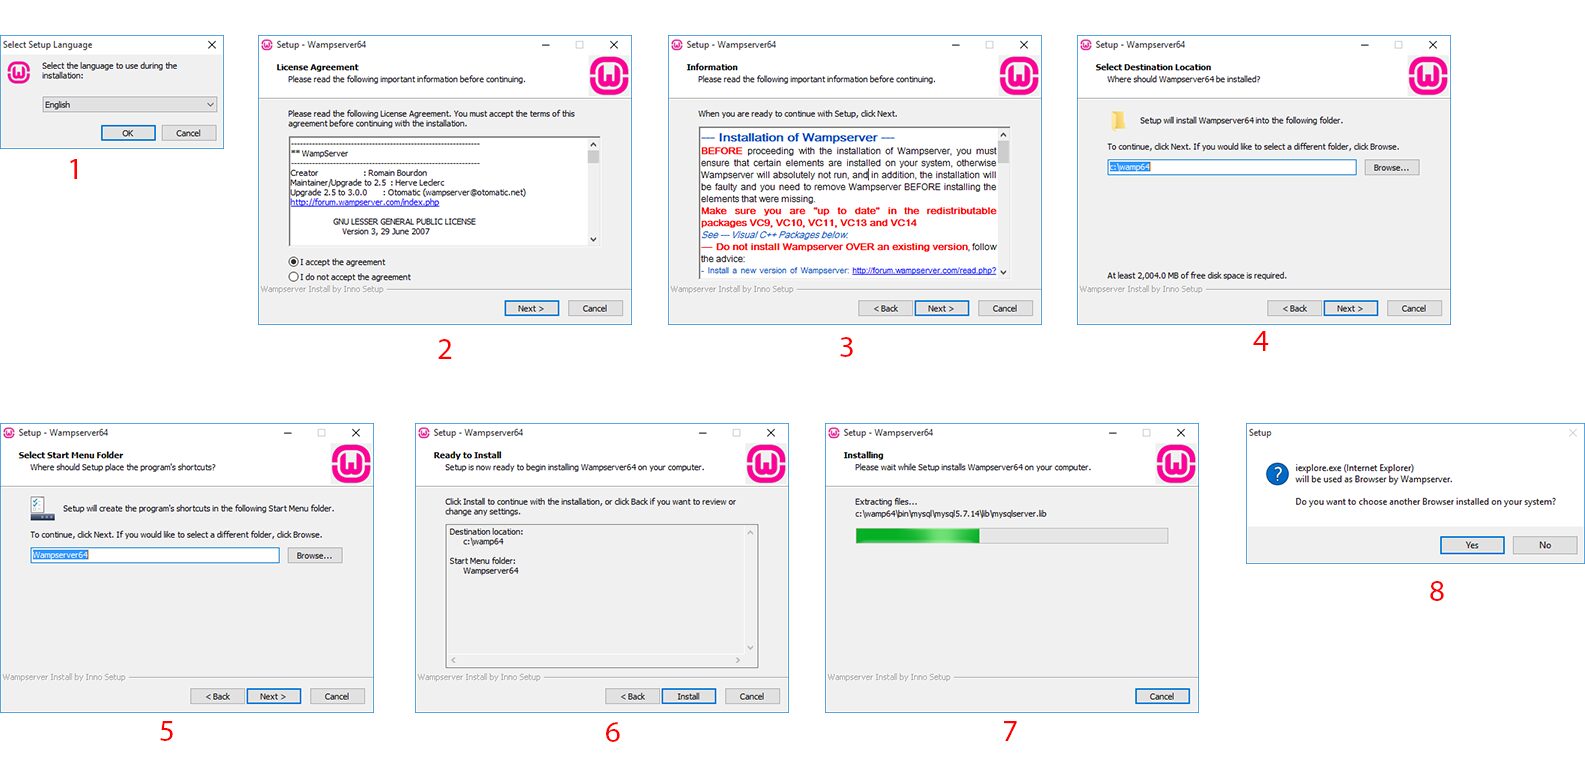
After you have successfully downloaded WAMP, run the installation file and follow the steps.
1. Choose the language you prefer.
2. Select the “I accept the agreement” option. Then click on “Next”.
3. The next window will show you important information. Click on “Next”.
4. In the next step you can elect the destination location for the installation. You can select the default location or the location that you want the WAMP to be in.
5. Next you’ll be given the option to select the start menu folder.
6. Click on the “Install” button to start the installation.
7. Wait till the installer extracts all the files to the specified location.
8. During the installation, you’ll be given the option to choose the browser that’ll be used by WAMP. By default it is Internet Explorer. If you want to go with any other browser then select “Yes” and locate the browser in Program Files.
9. Then click “Next” until you get to the final step. Then click on “Finish”.
Set Up a Database for WordPress
The next step to install WordPress locally is to set up a database for WordPress.
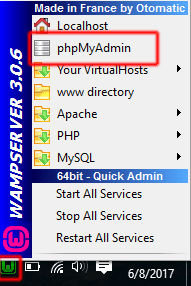
First you’ll need to run WAMP. Its icon will appear on the taskbar. Click on the icon and then click on “phpMyAdmin”.
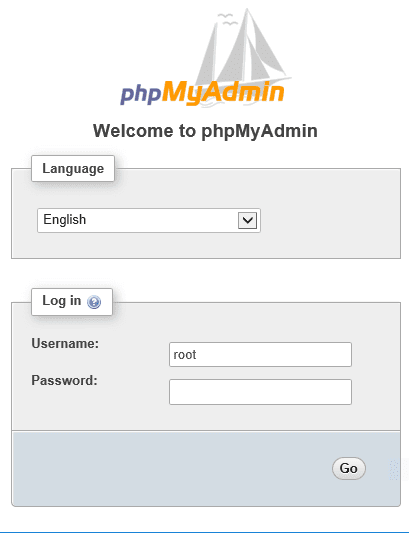
phpMyAdmin login screen will open in the browser. The username has to be “root”. For the tutorial we’ll leave the password field blank. You can do the same.
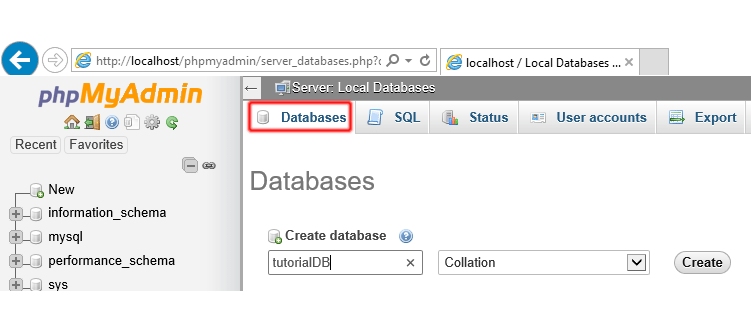
After you log in, click on Databases to create a new database for WordPress. We named our database “tutorialDB”. Name your database and then click on create.
Install WordPress Locally
Now that you’ve created a local server and a database for WordPress, you can proceed to install WordPress locally on your computer.
You will have to download a copy of WordPress. Next, you will have to extract the file you have downloaded.
Paste the “wordpress” folder that you just extracted into the “www” folder that you’ll inside the WAMP folder. For us the path is “C:\wamp64\www”. If you selected the default path for WAMP installation then it will be the same for you as well.
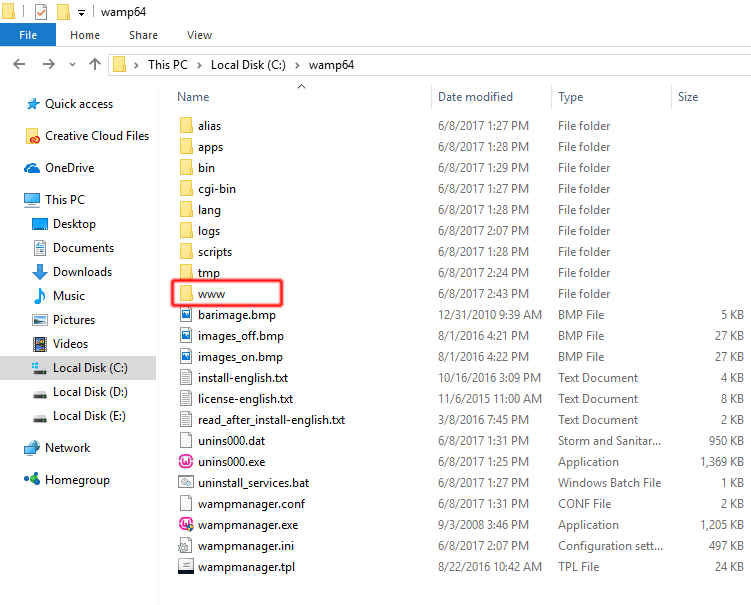
You have the freedom to rename the “wordpress” folder to anything you like. But remember that the folder name will be the URL of your local WordPress website. For this tutorial we name it “tutorial”.
Now open any web browser you like and then go to http://localhost/tutorial/
Remember to change “tutorial” with the name of your site you created earlier.
WordPress setup configuration will start straightaway. Select the language you prefer. Then it will show you some information. Read it as it may come in handy. After you are done, click on “Let’s go!”.
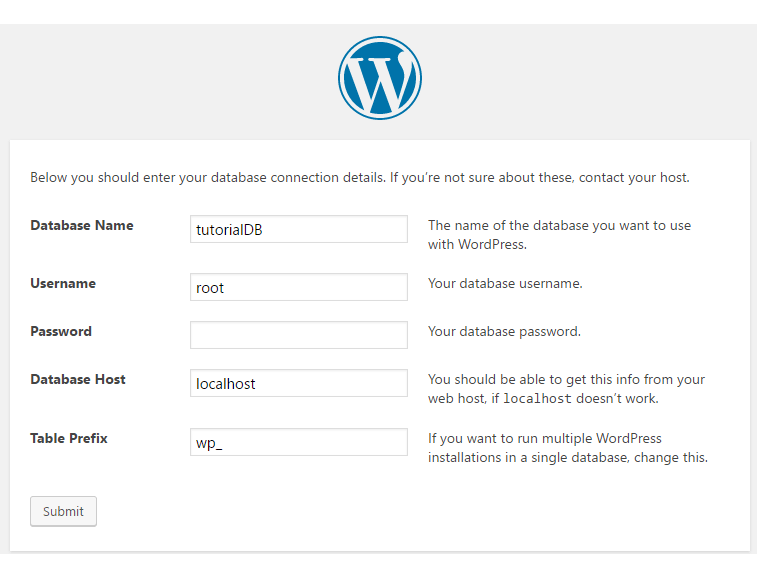
You will need to enter your database information on the next screen. Enter the name of the database you created earlier. In our case, it is “tutorialDB”. The username is “root”. You can leave the password blank. Leave the rest of the fields as they are and click on “Submit”.
On the next screen click on “Run the install”.
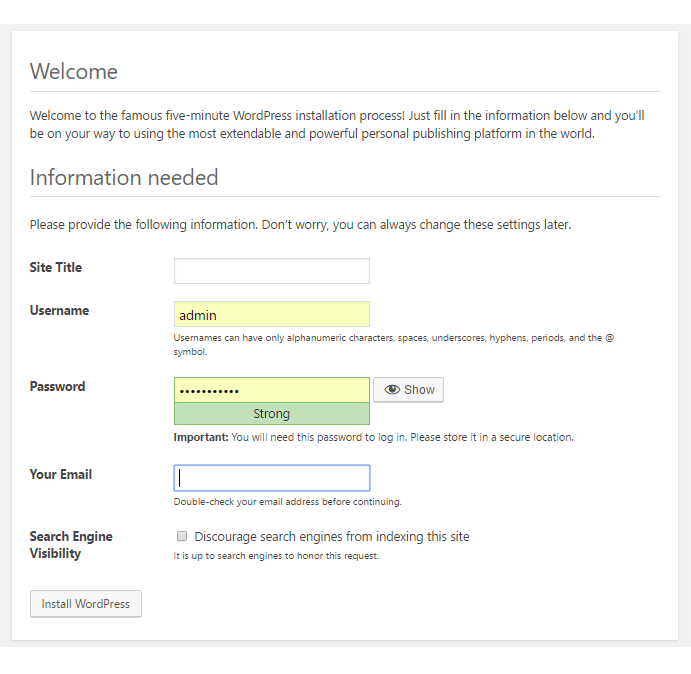
A form window will appear next. Fill in the site title, admin username, admin password, and admin email address. After you are done, click on the “Install WordPress” button.
The installation will run quickly. You will then see a message after the installation completes.
Congratulations! You have now learned to install WordPress locally on your Windows computer using WAMP.
In Conclusion
Now that you have learned to install WordPress locally, you can now start learning the basics of WordPress. As we have mentioned it in the beginning of this article, having WordPress in your computer can be very helpful. So, give it a try.
If you like this article and want to get more stuffs like this then please follow us on Facebook, Twitter, LinkedIn. You may also like some of our other articles.
Was this article helpful? If you have any thoughts or suggestions then feel free to send us your feedback in the comment section below.